
Introduction
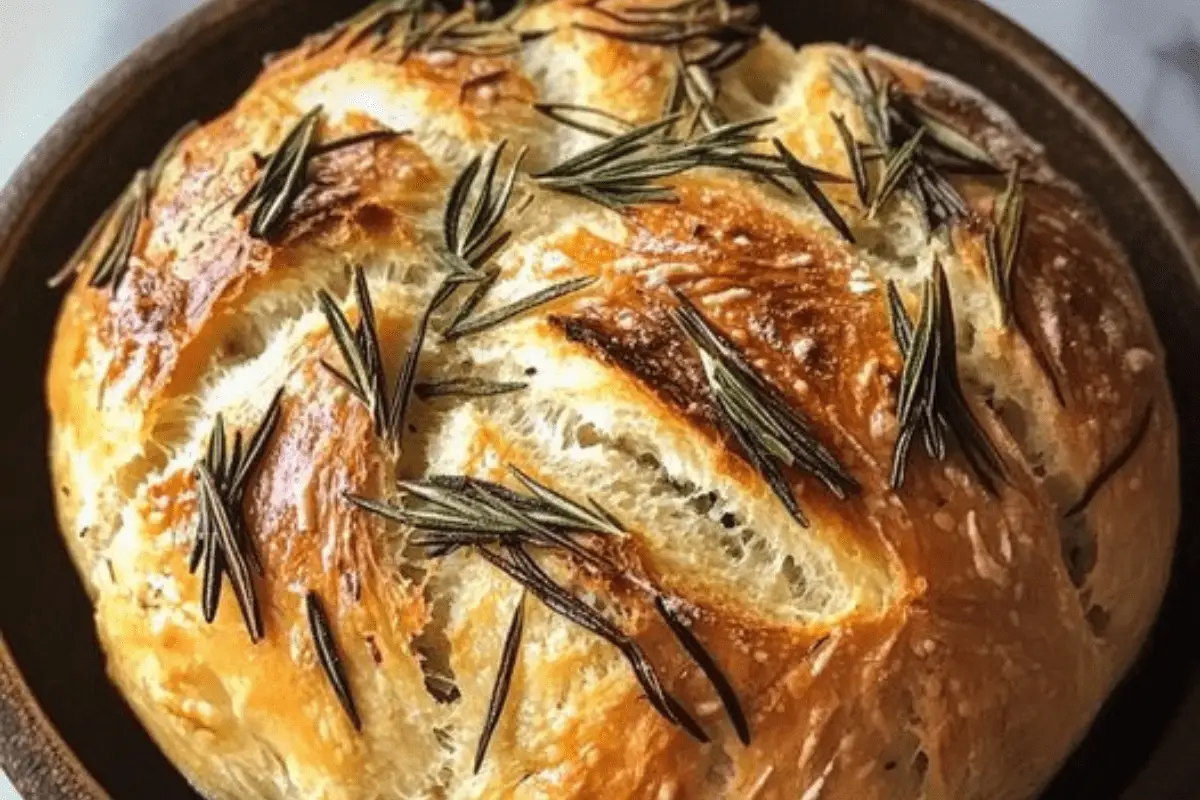
No Knead Rosemary Bread is a rustic, flavorful bread that anyone can easily make at home without the need for fancy equipment or extensive kneading. The combination of fresh rosemary and garlic gives the bread a fragrant aroma and delightful taste, while the no-knead method allows the dough to develop a beautiful structure with minimal effort. This bread is perfect for pairing with soups, salads, or simply enjoyed with olive oil or butter. The long fermentation process enhances the flavors and creates a chewy, flavorful crust, while the inside remains soft and aromatic. Whether you’re a beginner or an experienced baker, this no-fuss recipe yields a gorgeous loaf every time.
Ingredients:
- 3 cups all-purpose flour
- 3 cloves garlic, minced
- 1 tablespoon finely chopped fresh rosemary (or more, to taste)
- 1 ¼ teaspoons kosher salt
- ¾ teaspoon freshly ground black pepper
- ½ teaspoon instant yeast
- 1 ½ cups water (room temperature)
- 2 tablespoons cornmeal (for sprinkling)
Preparation:
Step 1:
In a large bowl, combine the dry ingredients: flour, minced garlic, chopped rosemary, salt, pepper, and instant yeast. Stir to evenly distribute the herbs and spices throughout the flour.
Step 2:
Slowly add the water to the dry mixture, using a wooden spoon or your hand to stir. Mix just until the ingredients come together to form a wet, sticky dough. This should take no longer than 30 seconds. The dough should be soft and quite moist but not overly runny.
Step 3:
Cover the bowl tightly with plastic wrap, ensuring no air can escape. Let the dough stand at room temperature for 18 to 24 hours. During this time, the dough will rise and develop bubbles on the surface, indicating that fermentation is taking place and the dough is ready for the next step.
Step 4:
After the dough has rested and risen, lightly oil a 10-inch cast-iron skillet or coat it with nonstick spray. Sprinkle the bottom of the skillet with cornmeal to prevent the bread from sticking and to give it a slightly crunchy texture on the bottom.
Step 5:
Lightly flour your work surface and gently turn the dough out of the bowl. Be careful not to deflate it too much. Shape the dough into a round loaf by folding the edges towards the center, then gently forming it into a smooth ball. Avoid kneading it, as the goal is to maintain the air bubbles formed during fermentation.
Step 6:
Place the dough in the prepared skillet, seam side down. Cover the skillet with a clean dish towel and let the dough rise for another 2 hours at room temperature, or until it has doubled in size. The dough should be puffy and should not spring back quickly when poked with a finger.
Step 7:
Preheat your oven to 450°F (230°C). Once the oven is hot, place the skillet with the dough inside and bake for 30-40 minutes, or until the bread has a golden-brown crust and sounds hollow when tapped. If the top browns too quickly, you can cover it loosely with foil during the last 10 minutes of baking.
Step 8:
Remove the bread from the oven and transfer it to a wire rack to cool. Let it cool for at least 15 minutes before slicing and serving.
Cooking Note:
This bread is very forgiving and can be customized with other herbs or flavorings such as thyme, sage, or olives. You can also experiment with different types of flour, such as whole wheat or bread flour, to change the texture and flavor.
For a crisper crust, you can place a pan of water in the oven while baking to create steam, which will help the bread develop a more rustic, bakery-style crust.
Serving Suggestions:
This No Knead Rosemary Bread is versatile and can be served in many ways. Serve it warm with a dipping sauce of olive oil and balsamic vinegar for a simple appetizer, or use it to make sandwiches with roasted vegetables, cheeses, or cured meats. It pairs beautifully with soups such as tomato basil or French onion, and makes an excellent companion for cheese platters, especially when paired with soft cheeses like Brie or goat cheese.
For breakfast, toast slices of the bread and spread with butter or jam, or serve alongside eggs for a hearty start to the day. It also makes delicious croutons when cubed and toasted in the oven with a drizzle of olive oil.
Tips:
- For an even more pronounced garlic flavor, you can roast the garlic cloves before adding them to the dough. Roasted garlic adds a mellow, slightly sweet taste that complements the rosemary well.
- If you don’t have a cast-iron skillet, you can use a Dutch oven or any oven-safe pot with a lid to create a similar result. Just be sure to preheat the pot in the oven before adding the dough to get a nice crust.
- The dough can also be refrigerated after the initial rise for up to 3 days, allowing you to bake fresh bread whenever you’re ready. Refrigeration will slightly slow the fermentation process but will also enhance the flavor.
Prep Time:
10 minutes (active) + 18-24 hours rising time
Cooking Time:
30-40 minutes
Total Time:
19-25 hours
Nutritional Information:
- Calories: 180 per slice (makes about 10 slices)
- Protein: 5g
- Sodium: 290mg
Conclusion
No Knead Rosemary Bread is an easy yet impressive bread recipe that requires little hands-on time but delivers big flavor. The combination of fragrant rosemary, savory garlic, and freshly ground pepper elevates this bread beyond your typical loaf. The long fermentation process creates a chewy crumb and a beautifully crispy crust, making it perfect for any meal or occasion. With its minimal ingredients and effortless preparation, this no-knead bread recipe is sure to become a favorite in your baking repertoire. Enjoy the satisfaction of homemade bread with this simple, rustic recipe.
Print
No Knead Rosemary Bread Recipe
- Total Time: 19-25 hours
Ingredients
Ingredients:
- 3 cups all-purpose flour
- 3 cloves garlic, minced
- 1 tablespoon finely chopped fresh rosemary (or more, to taste)
- 1 ¼ teaspoons kosher salt
- ¾ teaspoon freshly ground black pepper
- ½ teaspoon instant yeast
- 1 ½ cups water (room temperature)
- 2 tablespoons cornmeal (for sprinkling)
Instructions
Preparation:
Step 1:
In a large bowl, combine the dry ingredients: flour, minced garlic, chopped rosemary, salt, pepper, and instant yeast. Stir to evenly distribute the herbs and spices throughout the flour.
Step 2:
Slowly add the water to the dry mixture, using a wooden spoon or your hand to stir. Mix just until the ingredients come together to form a wet, sticky dough. This should take no longer than 30 seconds. The dough should be soft and quite moist but not overly runny.
Step 3:
Cover the bowl tightly with plastic wrap, ensuring no air can escape. Let the dough stand at room temperature for 18 to 24 hours. During this time, the dough will rise and develop bubbles on the surface, indicating that fermentation is taking place and the dough is ready for the next step.
Step 4:
After the dough has rested and risen, lightly oil a 10-inch cast-iron skillet or coat it with nonstick spray. Sprinkle the bottom of the skillet with cornmeal to prevent the bread from sticking and to give it a slightly crunchy texture on the bottom.
Step 5:
Lightly flour your work surface and gently turn the dough out of the bowl. Be careful not to deflate it too much. Shape the dough into a round loaf by folding the edges towards the center, then gently forming it into a smooth ball. Avoid kneading it, as the goal is to maintain the air bubbles formed during fermentation.
Step 6:
Place the dough in the prepared skillet, seam side down. Cover the skillet with a clean dish towel and let the dough rise for another 2 hours at room temperature, or until it has doubled in size. The dough should be puffy and should not spring back quickly when poked with a finger.
Step 7:
Preheat your oven to 450°F (230°C). Once the oven is hot, place the skillet with the dough inside and bake for 30-40 minutes, or until the bread has a golden-brown crust and sounds hollow when tapped. If the top browns too quickly, you can cover it loosely with foil during the last 10 minutes of baking.
Step 8:
Remove the bread from the oven and transfer it to a wire rack to cool. Let it cool for at least 15 minutes before slicing and serving.
Notes
This bread is very forgiving and can be customized with other herbs or flavorings such as thyme, sage, or olives. You can also experiment with different types of flour, such as whole wheat or bread flour, to change the texture and flavor.
For a crisper crust, you can place a pan of water in the oven while baking to create steam, which will help the bread develop a more rustic, bakery-style crust.
- Prep Time: 10 minutes (active)
- Cook Time: 30-40 minutes
- Category: 180 per slice
Nutrition
- Sodium: 290mg
- Protein: 5g